Welcome to the Camp Chef Pellet Grill Manual! This guide will help you master your pellet grill, covering key features, components, and essential operating tips. Explore versatile cooking techniques and maintenance advice to optimize your grilling experience. Discover how to achieve perfect smoke, sear, and flavor with your Camp Chef Pellet Grill.
1.1 Overview of the Camp Chef Pellet Grill
The Camp Chef Pellet Grill is a versatile outdoor cooking appliance designed for smoking, grilling, roasting, and baking. It combines wood pellet fuel with advanced technology to deliver consistent heat and rich, smoky flavors. Key components include a hopper for pellet storage, an auger for feeding pellets, and a fan system for heat circulation. This grill offers precise temperature control, making it ideal for both beginners and experienced cooks. Its durability and ease of use have made it a favorite among outdoor enthusiasts seeking delicious, restaurant-quality results at home.
1.2 Importance of Reading the Manual
Reading the Camp Chef Pellet Grill manual is essential for safe and effective operation. It provides detailed instructions for assembly, maintenance, and troubleshooting, ensuring optimal performance. The manual explains how to properly use the hopper, auger, and temperature control systems. Understanding these components helps prevent accidents and extends the grill’s lifespan. Additionally, the manual highlights safety precautions, such as proper ventilation and handling of propane, to ensure a secure cooking experience. By following the guidelines, you can maximize your grilling potential and enjoy consistent, delicious results.
1.3 Key Features of the Camp Chef Pellet Grill
The Camp Chef Pellet Grill offers a range of advanced features designed for versatile cooking. Its digital temperature control allows precise heat adjustment, ensuring consistent results. The large hopper capacity reduces pellet refills, while the automatic auger feeds pellets as needed. A robust ignition system ensures quick startups, and the heat baffle distributes smoke evenly for enhanced flavor. Additional features like the drip pan and grease management system simplify cleanup. These innovations make the Camp Chef Pellet Grill a top choice for both smoking and grilling enthusiasts.
Understanding the Components of the Camp Chef Pellet Grill
Familiarize yourself with the key components, including the hopper, auger, igniter, heat baffle, and drip pan. These parts work together to ensure efficient cooking and even heat distribution.
2.1 The Hopper: Storage and Feeding of Wood Pellets
The hopper is a crucial component of the Camp Chef Pellet Grill, designed to store and feed wood pellets into the grill. It ensures a consistent supply of fuel for cooking. Typically, the hopper can hold several pounds of pellets, depending on the model. Proper loading and maintenance are essential to prevent jams and ensure smooth operation. Always use dry, high-quality pellets for optimal performance. The hopper’s design allows for easy refilling and monitoring of pellet levels during cooking. Regular cleaning is recommended to avoid residue buildup and maintain efficiency.
2.2 The Auger: Role in Pellet Transportation
The auger plays a vital role in transporting wood pellets from the hopper to the burn pot. It operates on a motorized system, ensuring a consistent and controlled flow of pellets. This mechanism is essential for maintaining the desired temperature and flame. The auger’s design allows for precise pellet delivery, preventing overloading or fuel shortages. Regular maintenance, such as checking for blockages and cleaning, is necessary to ensure smooth operation. A functioning auger guarantees efficient combustion and consistent cooking performance.
2.3 The Igniter: Function and Maintenance
The igniter is responsible for initiating combustion by igniting the wood pellets in the burn pot. It works in conjunction with the control panel to ensure a safe and efficient start-up process. Regular maintenance is crucial to prevent malfunction. Clean the ignition area periodically to remove debris and ensure proper function. Check for wear or damage and replace parts as needed. A well-maintained igniter guarantees reliable grill performance and consistent flame production for optimal cooking results.
2.4 The Heat Baffle: Heat Distribution and Control
The heat baffle is a crucial component that ensures even heat distribution across the grill. It redirects heat from the burn pot, preventing hotspots and promoting consistent cooking temperatures. By controlling airflow and heat circulation, it enhances overall cooking performance. Regular cleaning is essential to maintain efficiency, as debris buildup can disrupt heat flow. Proper alignment and maintenance of the baffle ensure optimal grilling and smoking results, making it a key element for achieving perfectly cooked dishes every time.
2.5 The Drip Pan: Purpose and Cleaning
The drip pan is designed to catch grease, oil, and food residue, preventing mess and flare-ups. It is located beneath the cooking grates and plays a key role in maintaining cleanliness. Regular cleaning is essential to prevent buildup and bacterial growth. Remove the pan after each use, scrape off debris, and wash with mild soap and water. For tougher residue, soak it in hot soapy water before scrubbing. A clean drip pan ensures optimal grill performance and easier post-cooking cleanup, keeping your grill in top condition for future use.

Assembly and Initial Setup of the Camp Chef Pellet Grill
Begin by unpacking and inventorying all parts, then follow step-by-step assembly instructions. Connect propane and electrical components carefully. Complete the first-time ignition and burn-in process to prepare the grill for use.
3.1 Unpacking and Inventory of Parts
Start by carefully unpacking the grill and all accessories from the box. Check for any damage during shipping. Compare the included items with the parts list in the manual to ensure everything is present. Key components include the grill body, lid, hopper, cooking grates, drip pan, and hardware (screws, bolts, etc.). Organize smaller parts to avoid losing them. If any items are missing or damaged, contact customer support immediately. Proper inventory ensures a smooth assembly process.
3.2 Step-by-Step Assembly Instructions
Begin by attaching the legs and wheels to the grill body using the provided hardware. Next, connect the hopper to the main unit, ensuring it’s securely fastened. Install the cooking grates and drip pan, aligning them properly. Attach any additional components like shelves or handles. Tighten all bolts and screws firmly. Finally, plug in the electrical components and ensure all connections are secure. Refer to the manual for specific torque settings and alignment guides to avoid errors. Double-check all connections before proceeding to the next step.
3.3 Connecting Propane and Electrical Components
Begin by attaching the propane hose to the grill’s regulator, ensuring a secure connection. Tighten the fitting with a wrench to prevent leaks. Next, plug in the electrical power cord to a GFCI-protected outlet. Ensure all connections are tight and free from damage. Turn on the propane supply slowly and check for leaks using a soap solution. Finally, test the electrical components by turning on the control panel and verifying proper function. Always follow safety guidelines when handling propane and electrical systems to avoid hazards.
3.4 First-Time Ignition and Burn-In Process
Before first use, ensure all connections are secure. Plug in the grill and turn the power on. Set the temperature to 350°F and let it run for 30 minutes to burn off any manufacturing residue. Open windows for ventilation to avoid fumes. After 30 minutes, turn off the grill and let it cool. This process prepares the grill for cooking and ensures optimal performance. Always follow safety guidelines during the burn-in process.
Operating the Camp Chef Pellet Grill
Operating the Camp Chef Pellet Grill is straightforward, with easy temperature control and pellet monitoring effortlessly. The control panel simplifies adjustments, ensuring even heat distribution for consistent results.
4.1 Turning On the Grill: A Step-by-Step Guide
Start by ensuring the hopper is filled with pellets. Plug in the grill and press the power button. Allow the igniter to heat up for 3-5 minutes. Once the flame appears, set the desired temperature using the control panel. For safety, always ensure the grill is on a level surface and proper ventilation is maintained. Regularly monitor the pellet level to prevent interruptions during cooking. Follow these steps to ensure smooth and efficient operation of your Camp Chef Pellet Grill every time.
4.2 Setting and Adjusting Temperature
To set the temperature, use the control panel to select your desired heat level. The grill operates in 25-degree increments, allowing precise control. Once set, the grill automatically adjusts the pellet feed and airflow to maintain consistency. For optimal performance, preheat the grill for 10-15 minutes before cooking. Adjustments can be made during cooking, but allow a few minutes for the new temperature to stabilize. Proper temperature control ensures even cooking and enhances the overall grilling experience with your Camp Chef Pellet Grill.
4.3 Understanding the Control Panel Functions
The control panel is the central hub for operating your Camp Chef Pellet Grill. It features an LCD display showing temperature, timer, and pellet levels. Use the arrows to adjust settings, and the “Set” button to confirm changes. The panel also includes buttons for lighting the grill, setting timers, and monitoring pellet flow. Familiarize yourself with these functions to optimize your cooking experience. The manual provides detailed diagrams to help you navigate the control panel effortlessly and make the most of its advanced features for precise grilling control.
4.4 Monitoring the Pellet Level and Auger Operation
Regularly monitor the pellet level to ensure uninterrupted cooking. Check the hopper’s pellet level through the control panel or by visual inspection. The auger’s operation is crucial for feeding pellets to the fire pot. Listen for unusual noises, which may indicate issues like blockages. Ensure the auger moves smoothly and pellets flow consistently. Clean the auger periodically to prevent jams. Always keep the hopper lid closed to maintain proper pellet flow and safety. Monitoring these components ensures efficient and even heat distribution during your grilling sessions.
Cooking Techniques with the Camp Chef Pellet Grill
Master various cooking methods like smoking, grilling, roasting, and baking. Explore low-and-slow cooking for tender meats and high-heat searing for crispy finishes. Achieve perfection with precise temperature control and wood-fired flavor. Experiment with diverse recipes to unlock the grill’s full potential and elevate your outdoor cooking experience.
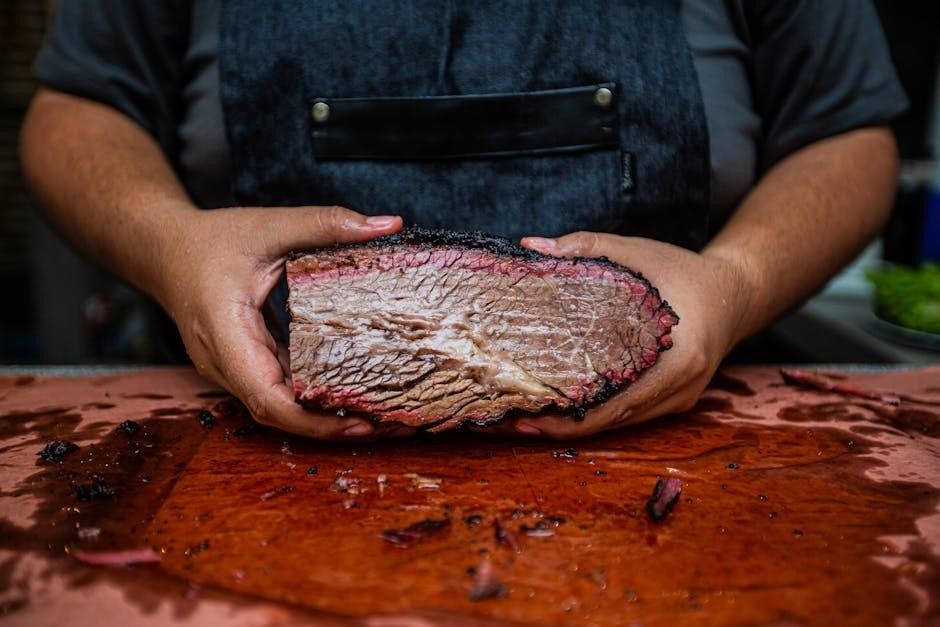
5.1 Smoking: Low and Slow Cooking
Smoking on the Camp Chef Pellet Grill involves cooking at low temperatures (225-250°F) for extended periods. This method is ideal for tenderizing tough meats like brisket or ribs. Use the control panel to set your desired temperature and select a wood pellet flavor that complements your dish. Pre-season meats generously and let them sit before grilling. Close the lid to trap smoke and heat, ensuring even cooking. Monitor temperature and pellet levels, adjusting as needed. For best results, cook until meat reaches an internal temperature of 190-205°F. Rest the meat, wrapped in foil, for 30 minutes before serving to retain juices and flavors.
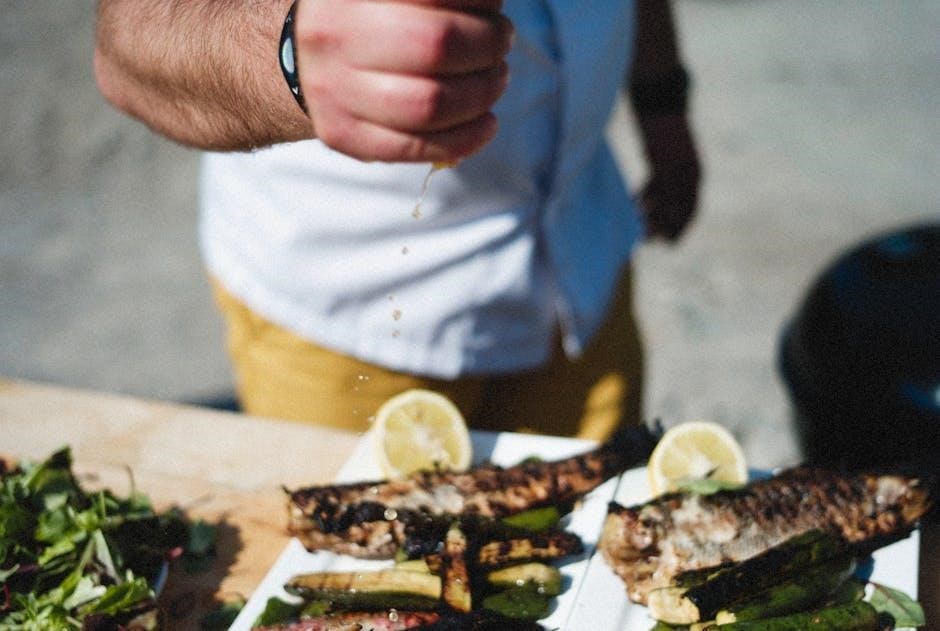
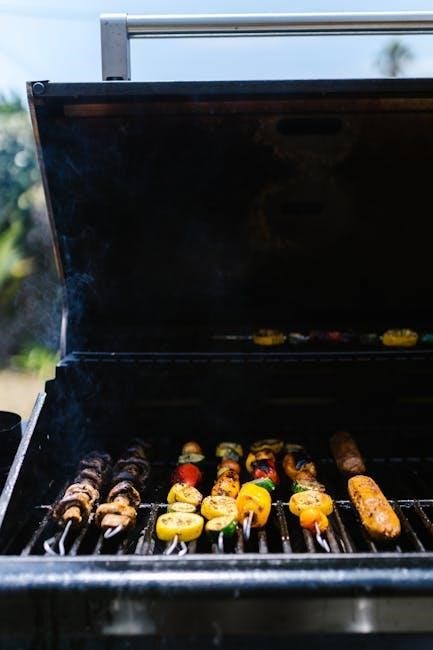
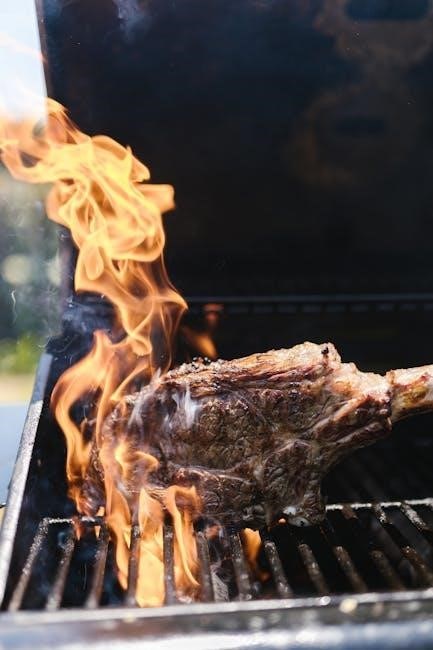
5.2 Grilling: Achieving Perfect Sear Marks
Preheat your Camp Chef Pellet Grill to high heat (around 400°F) before grilling to achieve perfect sear marks; Clean and oil the grates to prevent sticking. Pat dry the meat and season generously. Sear for 3-4 minutes per side without moving the meat to develop a flavorful crust. Use high-heat pellets like mesquite for a bold flavor. Don’t overcrowd the grill to ensure even searing. For enhanced results, consider using a cast iron grate. Monitor the temperature using the control panel to maintain consistent heat levels.
5.3 Roasting: Even Heat Distribution
For perfect roasting on your Camp Chef Pellet Grill, preheat to your desired temperature (325-375°F). Place the meat in the center of the grill to ensure even heat distribution. Use lower temperature settings for consistent cooking without hot spots. Wood pellets like apple or cherry add a rich, smoky flavor. Use the meat probe to monitor internal temperatures accurately. Avoid overcrowding the grill, as this can disrupt airflow. Cover the meat with foil if browning too quickly. Let the meat rest before carving for juicy, evenly cooked results.
5.4 Baking: Using the Grill for Bread and Desserts
Transform your Camp Chef Pellet Grill into a versatile oven for baking bread, pizza, and desserts. Preheat the grill to 300-400°F for even heat distribution. Use indirect heat to ensure consistent cooking without burning. Place dough or desserts on a pizza stone or baking sheet for crispy crusts and even textures. Experiment with pellet flavors like maple or cherry for unique twists. Monitor baking closely, as grills cook faster than traditional ovens. Achieve perfectly baked goods with the grill’s precision temperature control and smoky undertones for unforgettable treats.

Maintenance and Cleaning of the Camp Chef Pellet Grill
Regular cleaning and upkeep are essential for maintaining your Camp Chef Pellet Grill’s performance and longevity. Prevent pellet buildup and ensure all components function properly for consistent cooking results and safety.
6.1 Daily Cleaning: Grates, Drip Pan, and Hopper
Daily cleaning is crucial for optimal performance. Brush the grates with a wire brush before and after use to remove food residue. Empty and clean the drip pan regularly to prevent grease buildup. Wipe the hopper with a dry cloth to ensure pellet flow remains unobstructed. Cleaning these components daily prevents rust, clogs, and bacterial growth, ensuring consistent cooking results and extending the grill’s lifespan. Regular upkeep also enhances flavor and reduces maintenance over time.
6.2 Deep Cleaning: Interior and Exterior Surfaces
Deep cleaning involves thorough scrubbing of interior and exterior surfaces. Remove racks and shelves, then scrape off food residue with a putty knife. Use a mixture of water and vinegar to wipe down interior walls and surfaces. For exterior surfaces, a damp cloth and mild detergent will remove dirt and grime. Avoid harsh chemicals to prevent damage to finishes. Regular deep cleaning ensures optimal performance and prevents corrosion. This process should be done every 1-2 months, depending on usage frequency.
6.3 Lubricating Moving Parts
Lubricating moving parts ensures smooth operation and prevents wear. Apply a food-safe silicone-based spray to the auger motor, wheels, and hinges. Avoid using oil-based lubricants, as they can attract dust. Regular lubrication every 1-2 months keeps components functioning efficiently. This maintenance step is crucial for extending the grill’s lifespan and ensuring consistent pellet feeding and temperature control. Always follow the manufacturer’s recommendations for suitable lubricants to maintain warranty coverage and optimal performance.
6.4 Storing the Grill: Off-Season Preparation
Proper storage is essential for maintaining your Camp Chef pellet grill. Clean the grill thoroughly, including the grates, drip pan, and hopper, to prevent rust and pest infestation. Cover the grill with a high-quality, weather-resistant cover to shield it from rain and dust. Store in a dry, secure location, away from direct sunlight. Disconnect and store electrical components separately. Before storing, ensure all pellets are removed to prevent moisture absorption. Regularly inspect the grill during storage to ensure it remains in good condition for the next use.
Troubleshooting Common Issues
Troubleshooting helps resolve common problems like ignition failures, uneven heat, or pellet jams. Always refer to the manual for specific guidance and solutions to ensure optimal performance.
7.1 Grill Not Turning On: Potential Causes
If the grill fails to turn on, check the power connection and ensure the outlet is functioning. Verify that the circuit breaker hasn’t tripped. Inspect the propane tank for sufficient fuel and proper connection. A faulty igniter or blocked auger could also prevent ignition. Clean the igniter gently and ensure pellets are flowing freely. If issues persist, consult the manual or contact a professional for further assistance to resolve the problem effectively;
7.2 Uneven Heat Distribution
Uneven heat distribution can occur due to improper pellet flow or a blocked heat baffle. Ensure the hopper is filled adequately and pellets are flowing smoothly. Clean the heat baffle and drip pan regularly to prevent debris buildup. Check for any blockages in the auger or burn pot. Adjust the damper to regulate airflow for consistent heat. If issues persist, inspect the grill’s internal components for damage or misalignment and perform necessary repairs to achieve even cooking results.
7.3 Pellets Not Feeding Properly
If pellets are not feeding, check the hopper for low pellet levels and refill if necessary. Ensure the auger is clear of blockages, as debris can prevent proper pellet flow. Clean the auger and chute regularly to maintain smooth operation. Inspect the auger motor for damage or wear. If issues persist, verify that the control panel settings are correct and the igniter is functioning. Consult the manual for resetting or replacing faulty components to restore pellet flow and optimal grill performance.
7.4 Smoke or Flame Issues
Excessive smoke or inconsistent flames can indicate issues with pellet combustion. Check the burn pot for blockages and clean it thoroughly. Ensure the igniter is functioning correctly and replace it if damaged. Verify proper airflow by checking the chimney and vents for obstructions. If flames are uneven, inspect the heat baffle for damage. Ensure pellets are dry and of high quality, as damp or poor-quality pellets can cause incomplete combustion. Refer to the manual for guidance on adjusting settings or replacing components to restore normal operation and achieve consistent flames.
Accessories for the Camp Chef Pellet Grill
Explore essential accessories to maximize your Camp Chef Pellet Grill experience. High-quality pellets ensure consistent flavor, while durable covers protect your investment. Cleaning tools and additional surfaces enhance versatility for any recipe.
8.1 Recommended Pellet Types
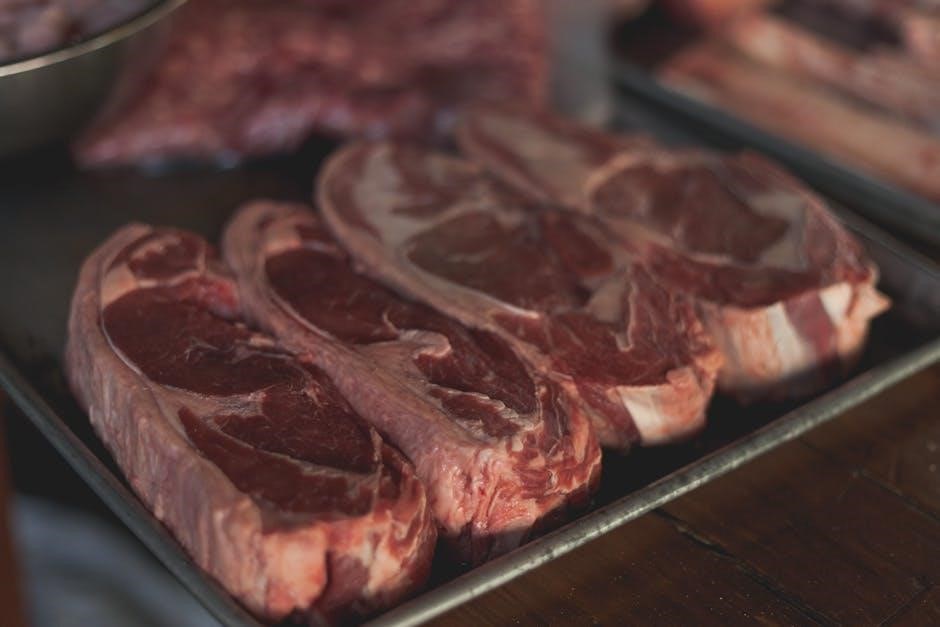
Choose high-quality wood pellets for optimal flavor and performance. Hickory, maple, and mesquite are popular for their distinct smoky profiles. Fruitwood pellets, like apple or cherry, add a sweeter, milder taste. Premium pellets with low moisture content burn efficiently, reducing ash production. Avoid softwoods, as they can produce harmful residues. Experiment with blends to create unique flavor combinations. Always store pellets in a dry, cool place to maintain quality and ensure consistent grill operation throughout your cooking sessions.
8.2 Essential Cleaning Tools
Essential cleaning tools for your Camp Chef Pellet Grill include a sturdy grill brush for cleaning grates, a putty knife for scraping stubborn residue, and a small vacuum or shop vac for removing ash and debris. A damp cloth or wipe is ideal for wiping down surfaces, while a mild grill cleaner can tackle tough stains. Regularly cleaning ensures optimal performance and prevents flavor contamination. Always avoid harsh chemicals to maintain the grill’s finish and longevity. Keep these tools handy for consistent upkeep and to prolong your grill’s lifespan.
8.3 Additional Cooking Surfaces
Additional cooking surfaces for the Camp Chef Pellet Grill enhance versatility and expand your culinary possibilities. A grill grate is ideal for searing meats, while a pizza stone ensures even heat distribution for baking. A smoker box allows for added wood chip flavors, and a griddle is perfect for cooking pancakes or searing vegetables. These surfaces are durable and easy to clean, making them a great addition to your grilling setup. Explore various options to discover new cooking techniques and elevate your outdoor cooking experience with the Camp Chef Pellet Grill.
8.4 Covers and Protective Gear
Covers and protective gear are essential for maintaining your Camp Chef Pellet Grill. A heavy-duty grill cover shields the unit from weather, dust, and debris, ensuring longevity. Water-resistant materials provide superior protection during storage. Protective gear like heat-resistant gloves and grill mats prevent damage to surfaces and skin during high-temperature cooking. Regular use of these accessories ensures your grill remains in excellent condition, ready for years of reliable performance. Invest in quality covers and gear to safeguard your investment and maintain peak functionality.
Safety Tips for Using the Camp Chef Pellet Grill
Always place the grill on a stable, heat-resistant surface, ensuring proper ventilation. Keep a fire extinguisher nearby and never leave the grill unattended while in use.
9.1 Placement and Ventilation
For safe operation, always place the Camp Chef Pellet Grill outdoors on a stable, heat-resistant surface. Ensure at least 36 inches of clearance from flammable materials like trees, fences, or overhangs. Proper ventilation is crucial to prevent carbon monoxide buildup. Avoid placing the grill in enclosed spaces, such as garages or gazebos, unless they are well-ventilated. Keep the grill away from direct wind to maintain consistent temperature and pellet flow. Always check local fire safety regulations before setting up your grill.
9.2 Handling Propane and Electrical Components
Always handle propane and electrical components with caution to ensure safety. Before connecting propane, inspect the hose for leaks using soap water. Turn off the propane tank and grill when not in use. Never tamper with electrical connections or use damaged cords. Keep electrical components away from water to avoid shocks. Follow the manual’s guidelines for connecting propane and electrical parts. Use only approved propane regulators and adapters. Regularly check connections for tightness and damage to prevent hazards.
9.3 Fire Safety Precautions
Always prioritize fire safety when using the Camp Chef Pellet Grill. Keep flammable materials like leaves or towels away from the grill. Never leave the grill unattended while it’s in operation. Ensure proper ventilation to prevent carbon monoxide buildup. Regularly inspect for grease buildup, as it can ignite. Keep a fire extinguisher nearby. Avoid overloading the grill with food, as excessive grease can cause flare-ups. Never use water to extinguish grease fires; instead, turn off the grill and starve the fire of oxygen.
9.4 Keeping Children and Pets Away
Ensure children and pets maintain a safe distance from the Camp Chef Pellet Grill while it’s in use. The grill can reach high temperatures, posing burn risks. Keep kids away to prevent accidental burns or injuries. Pets may also be curious, so secure the area to avoid them getting too close. Consider setting up a fenced zone around the grill when in operation. Supervise children and pets during cooking to ensure their safety and prevent unintended contact with hot surfaces or moving parts.
The Camp Chef Pellet Grill Manual provides comprehensive guidance for optimal performance and safety. By following these steps, users can achieve delicious results and extend the grill’s lifespan.
10.1 Final Thoughts on the Camp Chef Pellet Grill
The Camp Chef Pellet Grill is a versatile and user-friendly cooking solution for outdoor enthusiasts. Its ability to deliver consistent results makes it ideal for smoking, grilling, and baking. With proper maintenance and care, this grill will provide years of delicious meals. The manual serves as an excellent guide to unlock its full potential, ensuring safety and optimal performance. Whether you’re a novice or an experienced cook, this grill offers endless possibilities to explore a variety of recipes and enhance your outdoor cooking experience.
10.2 Encouragement to Explore More Recipes
Exploring new recipes with your Camp Chef Pellet Grill is a rewarding journey that unlocks endless culinary possibilities. From tender brisket to flavorful ribs, and even wood-fired pizzas, this grill simplifies achieving professional-quality results. Don’t hesitate to experiment with different pellet flavors, cooking techniques, and creative combinations. The versatility of the grill ensures that every meal is a delight, whether smoking low and slow or baking sweet desserts. Embrace the joy of cooking outdoors and continue discovering the satisfaction of crafting delicious meals for friends and family.